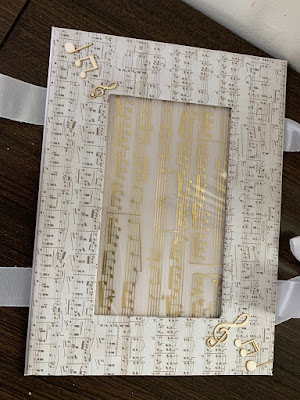
Welcome my crafty friends, today I am back with another DIY photo frame project. Client wanted a Music/education theme look, so I used DCWV Scripts And Music Notes paper pack 12"*12". Love the sober look of the paper. Use Music Chipboard by Mudra to embellish the frame. White ribbon to hang and join the three frames. Use tissue script paper scraps to make the tussle, hanging at the bottom.

Size of each frame is 24 cms by 18 cms which means 9.25 " by 7" inch. Cut the base of the frame chipboard of this size. Front panel size - 9.25"by 6.75". leaving the border of 1.5" from all 4 sides cut the center part.
 Cover both front and the back chipboard panels using beautiful papers of the paper pack.
Size - back - 10"*12", front - 9"*12".
 Paste acetate sheet at the back of the front panel. Tissue paper sheet on the top of the back panel for the shine. To give the depth, add thin chipboard panels on the three sides of the frame, leaving one side to insert the photo in.
 Paste the embellishments and voila you are done!
 the fame can easily hold 4"by 6" picture. Since this was a gift, I also made a gift box, decorated a little bit and a simple note card.
 Size - 12"*28". height - 2.5", length - 11". So we need - long side = 2.5, 11, 2.5, 11, 1.5 inches.
short side 2", 8", 2". this was a mistake, ideally it should be 2.5".
Decorate with Doily, Prima script flowers and die cut leaves


Size - back - 10"*12", front - 9"*12".


short side 2", 8", 2". this was a mistake, ideally it should be 2.5".
Decorate with Doily, Prima script flowers and die cut leaves


Hope you like the project and got inspired :)


